Opencode Setup Tutorial
This tutorial will guide you through adding your CheapTokenRouter API key to the Opencode Terminal Agent.
Prerequisites
Before you begin, make sure you have:
- A CheapTokenRouter API key
- Opencode installed on your computer
Step 1: Get Your CheapTokenRouter API Key
- Navigate to your CheapTokenRouter dashboard
- Goto the API Keys module [https://cheaptokenrouter.com/dashboard/keys]
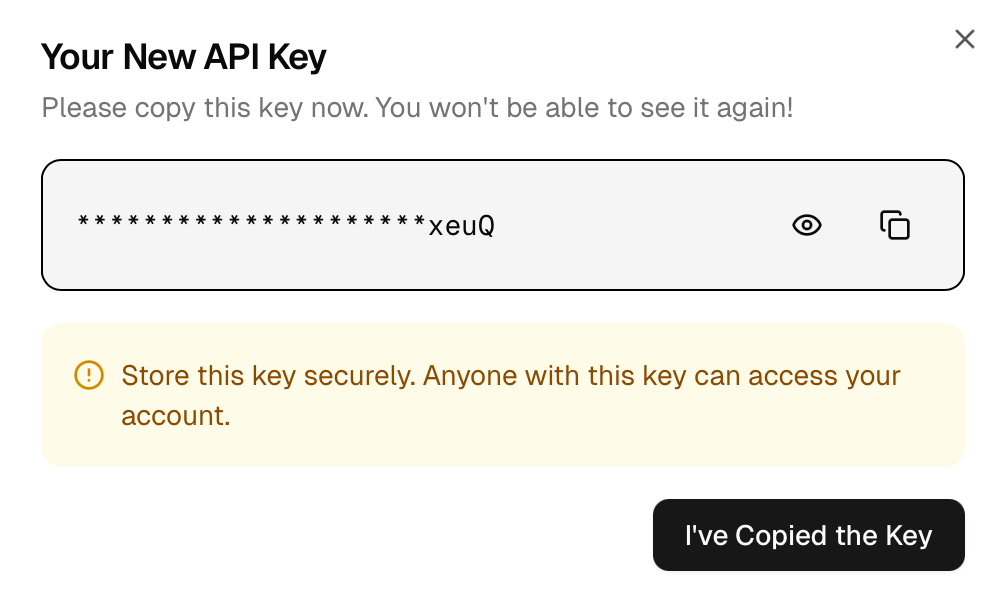
- Click Create Key and give it a nickname / alias memorable to you
- Copy down this API key and store it securely until you need to use it
Step 2: Set Up Auth For Opencode and CheapTokenRouter
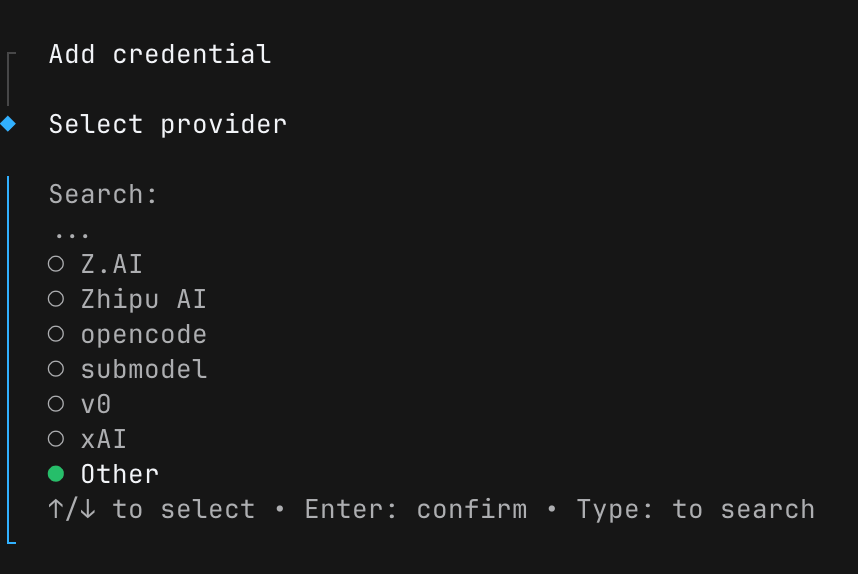
- Go to a project directory that you want to work on with Opencode
- Run this command and scroll down to Other.
opencode auth login
- Enter this for the provider:
cheaptokenrouter

Step 3: Download A Copy Of opencode.json
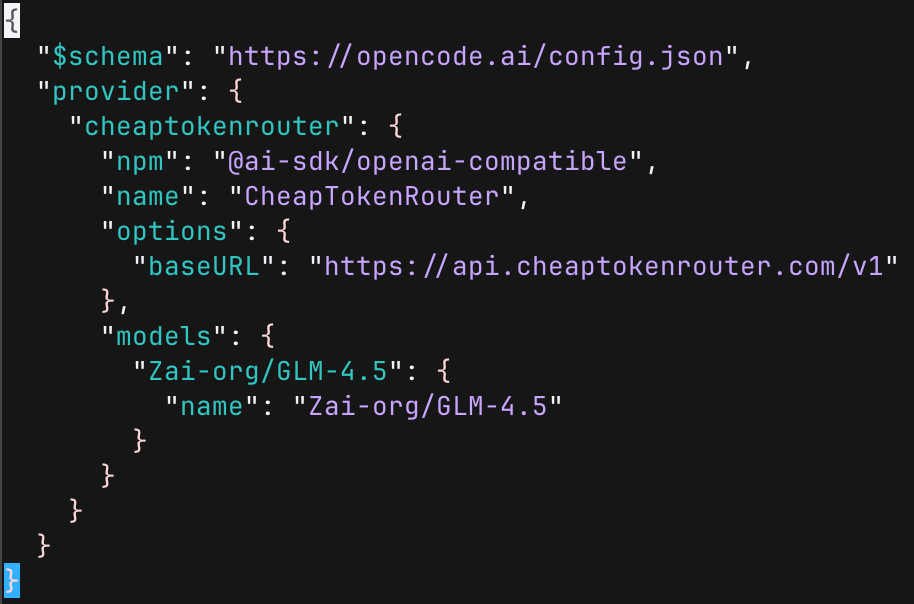
- Download a copy of the latest opencode.json with all our models pre-filled in here [https://cheaptokenrouter.com/opencode.json]
- Move the file to your user's main profile at: ~/.config/opencode/opencode.json (Alternatively, use the terminal command below to download the config and copy it to your default settings in one line)
wget https://cheaptokenrouter.com/opencode.json -O ~/.config/opencode/opencode.json
Step 4: Start Up Opencode And Select Model

- Start up Opencode in the directory, and run the /models command.
- Either search or press up and down until you find the model you want from CheapTokenRouter.
- Press enter to select the model. You're ready to begin coding!
Troubleshooting
API Key Not Working
- Double-check that you copied the entire API key and pasted it into Step 2
- Ensure your API key is still active in your CheapTokenRouter account
- Try regenerating your API key if needed